Birthday Cards, Bumbleberry Papercrafts, Uncategorized

Birthday Card Using Lawn Fawn’s “Be Hap-Pea” Stamp Set!

Hey lovelies!
I’m back this week with another birthday card, I find it handy to always have a couple stashed away in case I forget or I’m too busy to sit down and create one week! This time I’m using the adorable “Be Hap-Pea” stamp set from Lawn Fawn, I love a good punny set!
5
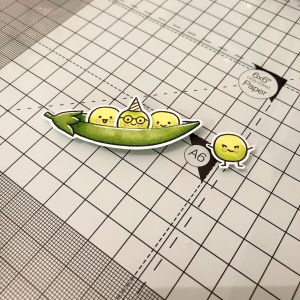
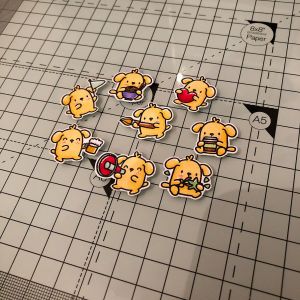
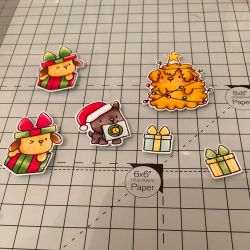
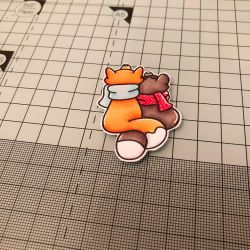
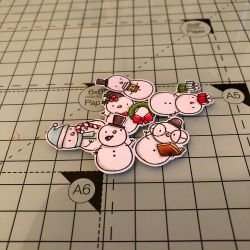
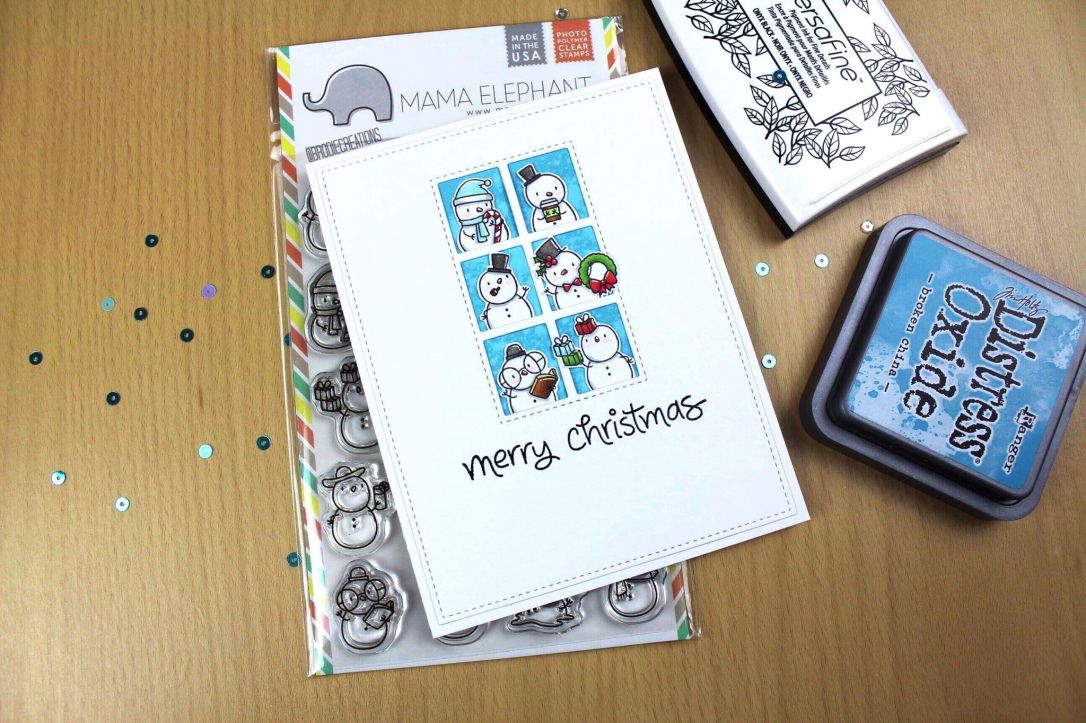
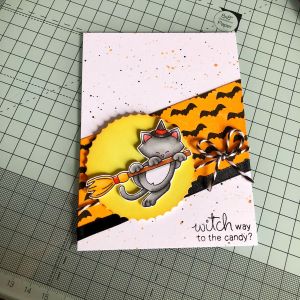
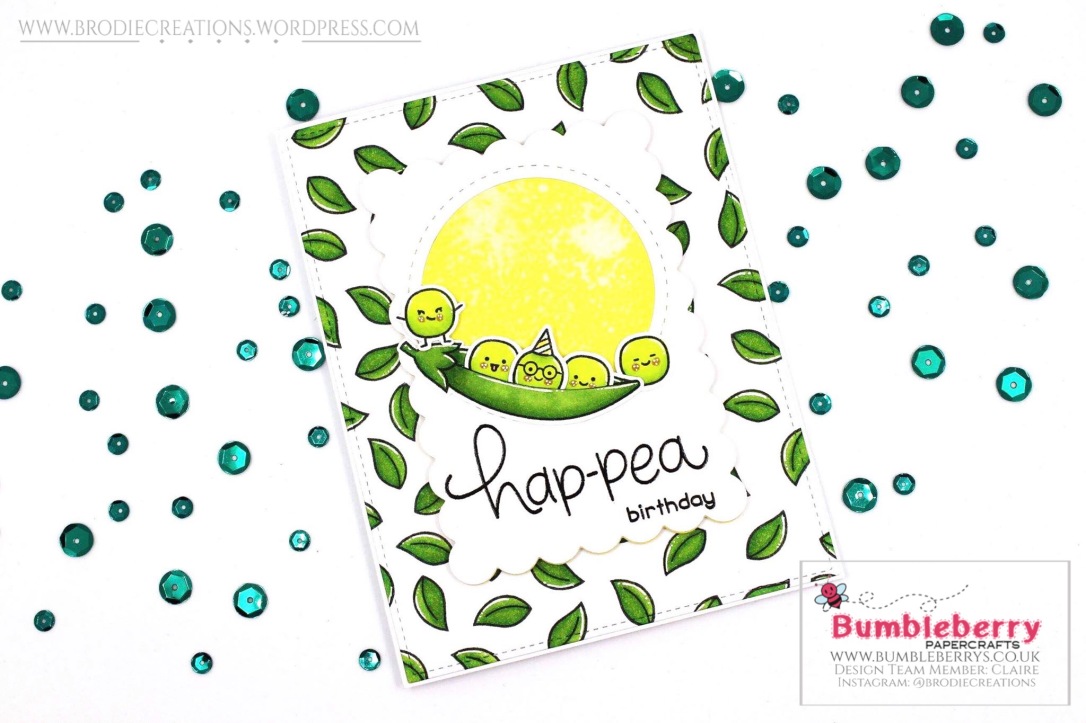
I stamped a couple of the peas out and one of the pods using Memento Tuxedo Black ink, I used some of the adorable faces that come with the set to give them different expressions! As I planned for this to be a birthday card I made sure to stamp one wearing a party hat too. I coloured them using my alcohol markers and added some highlights and details with a white gel pen before fussy cutting them all out. I used a craft knife to cut along the middle line of the pea pod so I could adhere three of my peas inside it using Scor-Tape.
12.jpg4
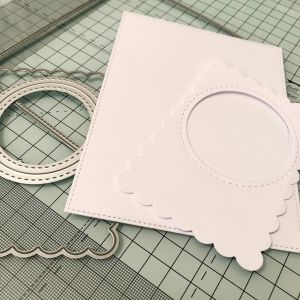
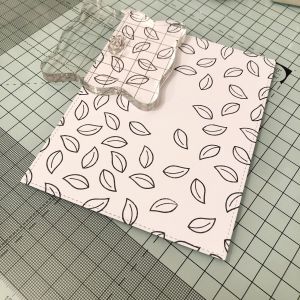
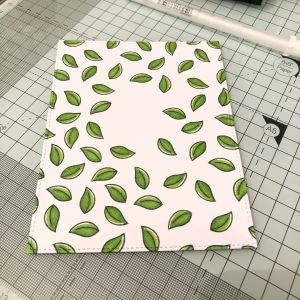
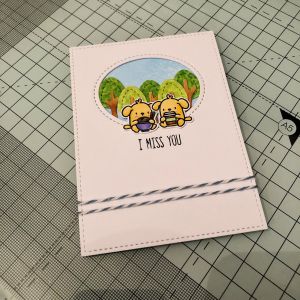
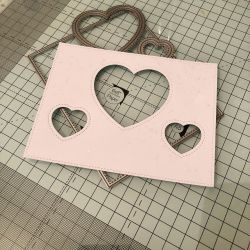
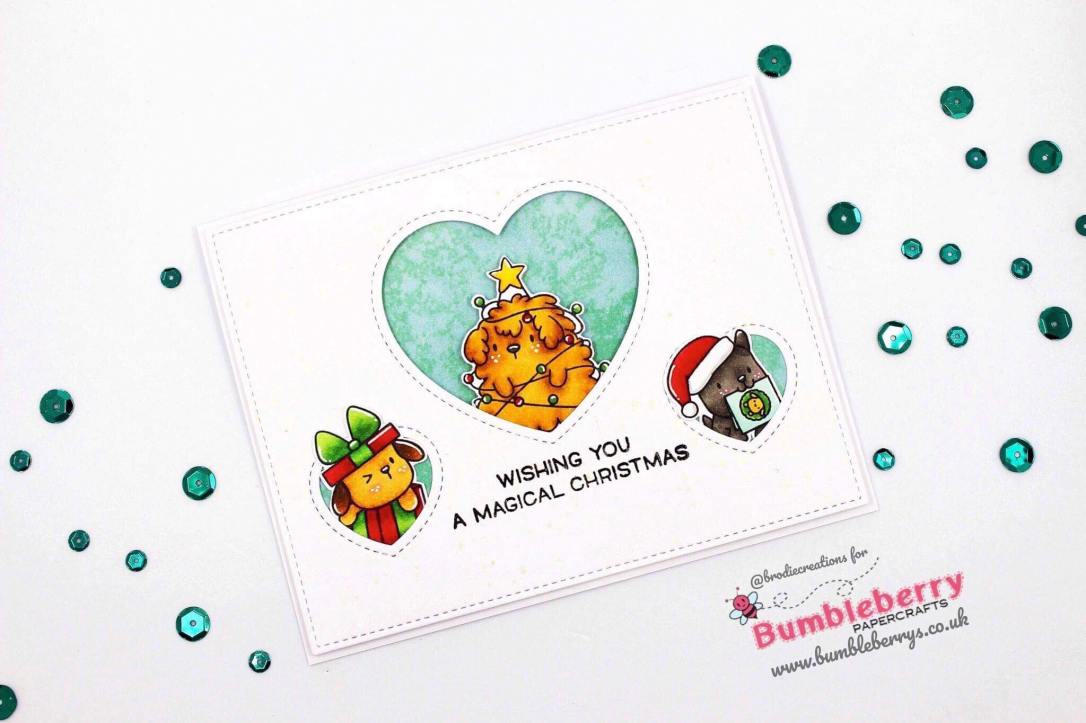
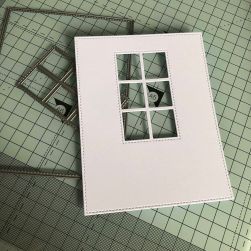
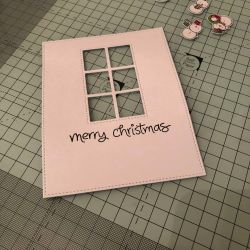
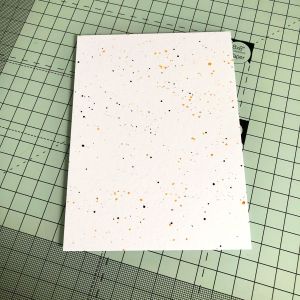
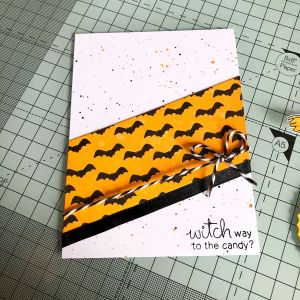
I cut all of my panels from heavy weight white card stock, I used the largest of the “Basic Rectangles” Creative Cuts from Mama Elephant for my background panel. For my focal point on my card I used the smaller scalloped die from the “Framed Tags” Waverly Creative Cuts from Mama Elephant and used one of the circle dies from Honey Bee Stamps’ “Double Stitched Circles” Honey Cuts to create the window. I used the leaf stamp from the set to stamp leaves all over my background panel with Memento Tuxedo Black ink again, coloured them with my alcohol markers and used a white gel pen to add highlights.
36
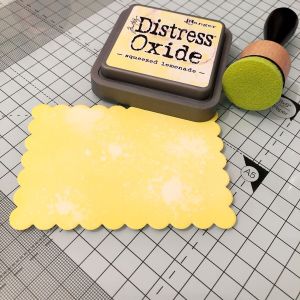
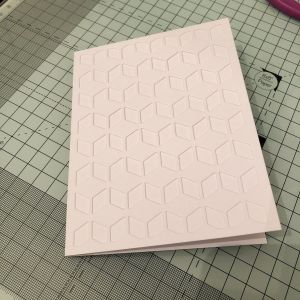
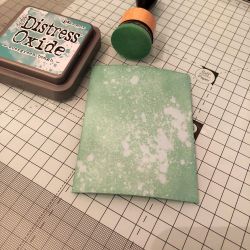
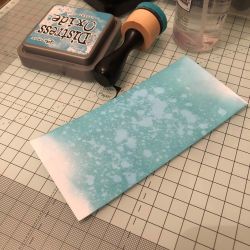
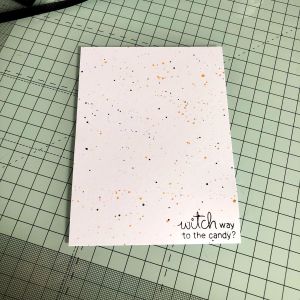
I used my Misti stamping tool to keep my scalloped panel in place and used my powder tool applicator to prep my panel. I used Versafine Onyx Black ink to stamp my sentiment, removing it from my Misti before coating it in clear embossing powder and setting the powder with my heat tool. I cut another scalloped panel from white card stock and blended it with Squeezed Lemonade Distress Oxide Ink, sprayed it with my Distress Sprayer and cleaned up the excess water. I adhered the yellow panel behind my windowed panel using Scor-Tape so my window would have the yellow background.
78
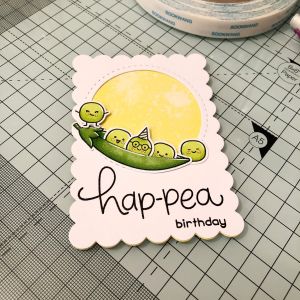
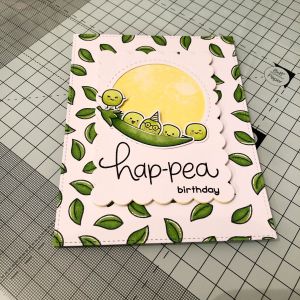
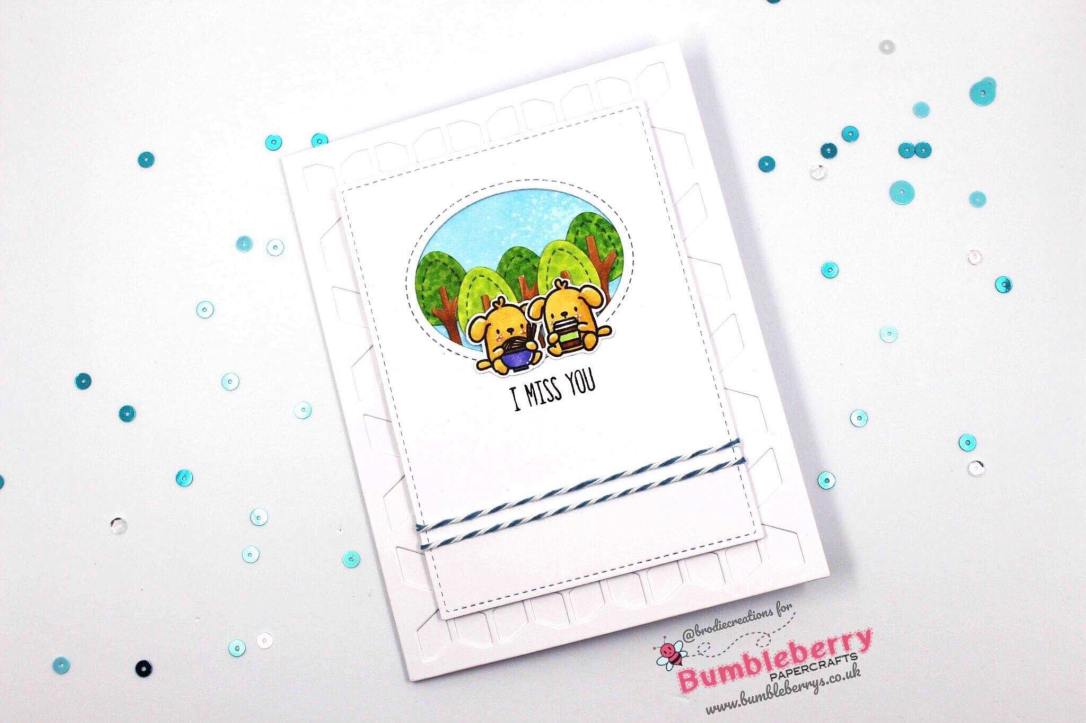
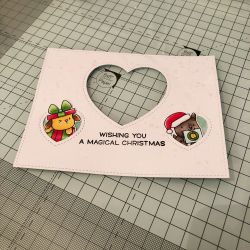
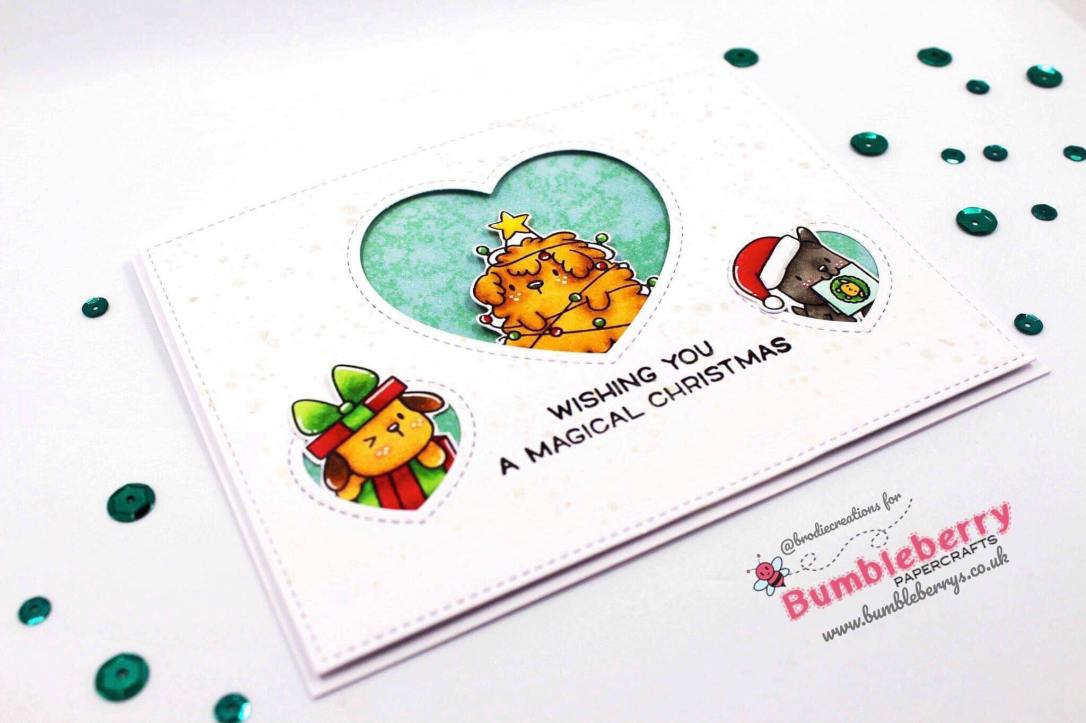
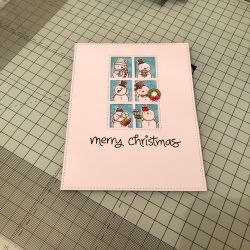
I adhered my peas in the pod and the one slightly behind it with Scor-Tape, but decided to pop the one standing on top of the pod up with 3M Scotch Double Sided Foam Tape. I took my scalloped panel, adhered it to my background panel using foam tape once again so it was slightly raised and adhered to my card base.
P25 LF Be Hap-Pea
Thanks for reading lovelies! Do you always keep a stash of birthday cards at the ready? I have to admit I’ve been pretty poor at keeping a stash myself lately, but I’m slowly building one back up! I’ll see you next week with another card!

Claire

xo

Bumbleberry Papercrafts
Shop
Blog

Supplies

Stamps & Dies
Lawn Fawn “Be Hap-Pea” Stamp Set
Mama Elephant “Basic Rectangles” Creative Cuts
Mama Elephant “Framed Tags” Waverly Creative Cuts
Honey Bee Stamps “Double Stitched Circles” Honey Cuts

Inks
Squeezed Lemonade Distress Oxide Ink

Tools
Misti Stamping Tool

Adhesives
1/2″ Scor-Tape
3M Scotch Double Sided Foam Tape

Bumbleberry Papercrafts, Friendship Cards, Just Because Cards, Uncategorized

Friendship Card Using Mama Elephant “Little Dog Agenda” Stamp Set!

Hey lovelies!
Today I’m sharing with you a card I made using the Mama Elephant “Little Dog Agenda” stamp set! I love the Little Agenda sets as I feel they’re so versatile!
1
I stamped the images using Memento Tuxedo Black ink, coloured them with alcohol markers and used a white gel pen to add highlights. I wasn’t sure which of the images I wanted to use just yet, so I fussy cut a bunch of them out so I could just grab the ones I wanted when it came to assembling my card! The others can be saved for future projects.
2
I cut a panel from white card stock using the Mama Elephant “Basic Rectangles” Creative Cuts and cut a window using the oval from Lawn Fawn’s “Shadow Box Card” dies.
3
I cut some trees from the “Shadow Box Card” dies too and coloured them using my alcohol markers.
45.jpg
I blended some “Salty Ocean” Distress Ink on to a square of white card stock larger than my window and distressed it slightly using my distress sprayer. I assembled my scene in the window first then adhered my images on top. To finish my panel I stamped my sentiment from Neat and Tangled’s “Beavers Eh” set using Versafine Onyx Black ink. I double wrapped some blue and white twine around my panel and adhered it at the back.
6.jpg
I cut a background panel from white card stock using Altenew’s “Cube Cover” die, created my card base and adhered them together using double sided tape. I popped my smaller panel up on my base using 3M Double Sided Foam Tape to finish.
P9 ME Little Dog Agenda
Thanks for reading lovelies!

xo

Bumbleberry Papercrafts
Shop
Blog

Supplies

Stamps & Dies
Mama Elephant “Little Dog Agenda” Stamp Set
Neat & Tangled “Beavers Eh” Stamp Set
Mama Elephant “Basic Rectangles” Creative Cuts
Lawn Fawn “Shadow Box Card” Dies
Altenew “Cube Cover” Die

Inks
Tim Holtz Distress Ink Minis Kit #2 (Salty Ocean)

Adhesives
3M Scotch Double Sided Foam Tape

Christmas Cards, Uncategorized

Adorable Christmas Card Using Mama Elephant “Yappy Woofmas” Set!

Hey lovelies!
Are you all preparing for Christmas yet? There have been so many amazing sets being released lately it’s hard not to think about the holidays! I couldn’t wait to dive in to this lot of cuties from the Mama Elephant “Yappy Woofmas” set! I have two dogs of my own, meaning I have a serious soft spot when there’s a new set filled with cute dogs!
1.jpg
I stamped my images using Memento Tuxedo black ink and coloured them using my alcohol markers. I ended up only using three of them for this card and set the others aside for a separate project! I added blush to their cheeks with a pink coloured pencil, as well as details and highlights using a white gel pen before fussy cutting them out.
2.jpg
I die cut a panel using the Mama Elephant “Basic Rectangles” Creative Cuts and cut some windows on my panel with the Lawn Fawn “Outside In Stitched Heart Stackables” dies to keep with the stitched theme! Once I was finished with die cutting I splattered some silver and pale gold metallic watercolour paint on my panel, unfortunately this doesn’t show too well in photos but it adds a lovely shimmer to the card when it hits the light!
3
I used Evergreen Bough Distress Oxide ink and blended it on to some white card stock before spraying it with my distress sprayer. I cut this in to sections to become the backgrounds of the windows in my panel!
4.jpg
I stamped my sentiment from Lawn Fawn’s “Winter Skies” set directly on to my panel using Versafine Onyx Black ink, coated it in clear embossing powder and set with my heat tool. I adhered the backgrounds to the smaller hearts directly against the back of the panel, but added some foam tape for the larger heart to add some depth. I popped my little dogs in place and adhered my panel to my card base!
P3 ME Yappy Woofmas
P3 ME Yappy Woofmas 2
Thanks for reading lovelies! I’m sure I’m going to get a lot of use from this set this year! There are so many adorable images I haven’t even used yet!

xo

BumbleBerry Papercrafts
Shop
Blog

Supplies

Stamps & Dies
Mama Elephant “Yappy Woofmas” Stamp Set
Lawn Fawn “Winter Skies” Stamp Set
Mama Elephant “Basic Rectangles” Creative Cuts
Lawn Fawn “Outside In Stitched Heart Stackables” Dies

Inks
“Evergreen Bough” Distress Oxide Ink

Friendship Cards, Just Because Cards, Uncategorized

Cute Firework Scene Using Lawn Fawn and MFT Stamps!

Hey lovelies!
With Guy Fawkes night just around the corner I created this “just because” card using the gorgeous new “Winter Skies” set from Lawn Fawn alongside MFT’s “Fireworks” set! We don’t usually send cards for Guy Fawkes night here, but for me if there’s a celebration that’s reason enough for me to make a card to send to my loved ones!
1.jpg
I cut a panel using the “Basic Rectangles” Creative Cuts from Mama Elephant, stamped my fireworks using Versamark ink, coated them in white embossing powder and set with my heat tool. I blended Abandoned Coral, Mermaid Lagoon and Seedless Preserves Distress Ink in small areas all over my panel before blending Black Soot Distress Ink all over keeping it darker towards the edges. I sprayed my panel with my Distress Sprayer and cleaned up the excess water. I splattered the entire panel using white watercolour paint and some metallic gold watercolour paint to give a slight shimmer.
2.jpg3.jpg
I stamped my images from Lawn Fawn’s “Winter Skies” set using Memento Tuxedo Black ink and coloured them using my alcohol markers. I fussy cut them out and added some highlights with a white gel pen. To ground my images I cut a panel the same size as my background from black card stock, and cut a simple hill shape using my scissors before adhering everything in to place.
45.jpg
I cut a larger panel from white card stock using the “Basic Rectangles” Creative Cuts to frame my smaller panel and stamped it with fireworks using Iced Spruce Distress Oxide Ink. I used my powder tool on the black hill piece of my card, stamped my sentiment from Neat and Tangled’s “Beavers Eh” stamp set, heat embossed it with white embossing powder and adhered everything to my card base!
P2 LF Winter Skies.jpg
Thanks for reading lovelies! I definitely love how well these two sets work together! I feel like this would be a great idea for New Year cards too!

xo

Bumbleberry Papercrafts
Shop
Blog

Supplies

Stamps & Dies
Lawn Fawn “Winter Skies” Stamp Set
My Favorite Things “Fireworks” Stamp Set
Neat and Tangled “Beavers Eh” Stamp Set
Mama Elephant “Basic Rectangles” Creative Cuts

Inks
Memento “Tuxedo Black” Ink
Versamark Ink
Distress Ink Minis Kit #13 (Abandoned Coral & Mermaid Lagoon)
Distress Ink Minis Kit #2 (Seedless Preserves)
Distress Ink Minis Kit #3 (Black Soot)
“Iced Spruce” Distress Oxide Ink

Bumbleberry Papercrafts, Christmas Cards, Uncategorized

Simple Christmas Cards Using Mama Elephant’s “Little Agenda” Sets!

Hello there lovelies!
Time to dust off my laptop and get back to blogging! I took a short break but I’m back now, with exciting news! I’m thrilled to share with you that I have joined a group of talented crafters on the Bumbleberry Papercrafts design team! Bumbleberry’s is a UK based store that carries quality craft supplies from leading American brands, so if you’re like me and reside in the UK but struggle to find some of your favourite brands without paying a fortune in shipping – head on over to the shop to have a look around!
Today I have a mini set of 3 Christmas cards to share with you as my first project at Bumbleberry’s, anybody else find themselves panicking about how many cards you have to make in the small amount of time you have before the holidays? The Little Agenda stamps are a perfect solution to this, the images are small enough so colouring is over in a flash! Paired with the Basic Rectangle Creative Cuts also from Mama Elephant made creating these so incredibly quick and easy!
1
I stamped these adorable snowmen from the Little Snowman Agenda set using Memento Tuxedo Black ink and coloured them using my alcohol markers. I added some highlights using a white gel pen before fussy cutting them out.
23
I cut my panel and the window using the Basic Rectangle Creative Cuts from Mama Elephant. I prepped my panel using my powder tool, stamped my sentiment from Lawn Fawn’s Christmas Dreams stamp set in Versafine Onyx Black ink, coated it in clear embossing powder before setting it with my heat tool.
456
Now that my front panel was ready, I blended some Broken China Distress Oxide Ink on a strip of white card stock, distressed it using my distress sprayer and cleaned up the excess water. I adhered it to the back of my panel, popped my little snowmen in to place and adhered it to my card base!
P1 Snowmen.jpg
I cut multiple panels at once in order to make this a mini set of 3! Here are the other two cards I created using the Little Reindeer Agenda and Little Santa Agenda sets:
P1 Reindeer
P1 Santas.jpg
I changed up the background colour each time to give them a slightly different feel!
Thanks for reading lovelies! I’m so excited to be working with Bumbleberry Papercrafts and to see what the other talented ladies on the team will create too! Be sure to head on over to the website and blog to find more inspiration!

xo

Bumbleberry Papercrafts
Shop
Blog

Supplies:

Stamps & Dies:
Mama Elephant “Little Snowman Agenda” Stamp Set
Mama Elephant “Little Reindeer Agenda” Stamp Set
Mama Elephant “Little Santa Agenda” Stamp Set
Lawn Fawn “Christmas Dreams” Stamp Set
Mama Elephant “Basic Rectangles” Creative Cuts

Inks:
Memento “Tuxedo Black” Ink
“Broken China” Distress Oxide Ink
“Evergreen Bough” Distress Oxide Ink
Distress Ink Minis Kit #13 (Abandoned Coral)

Friendship Cards, Halloween Cards, Uncategorized

Witch Way To The Candy? Cute Halloween Card Using Newton’s Nook “Boo-tiful Night” Set! (Inky Paws Challenge #80)

Hey lovelies!
Today I’m sharing this cute Halloween card I made for Newton’s Nook “Inky Paws” challenge! You can check out more about the challenge here! For this challenge you have to follow a card sketch, which is something I’ve never done before! Of course I had to make the theme of my card Halloween – we all know I’m on a Halloween kick lately and I doubt I’ll stop making Halloween cards until November at this rate!
1.jpg
To start I stamped this cute little witch cat using Memento Tuxedo Black ink and coloured him in using my Spectrum Noir alcohol markers. I added rosy cheeks with a pink coloured pencil and highlights with my white gelly roll pen.
Spectrum Noir colours used:
Cat: (Fur) IG5, GG2, GG1 (Nose) CR2 (Ears) CR2, FS8
Broom: TN5, TN3, GB6, GB1, CR7, OR3, OR2
Hat: BG5, BG3, CR7, OR3, OR2
2
Once I had fussy cut out my image, I cut down a panel from heavy white card stock. I made a smaller panel the same width and cut across it diagonally, I blended Carved Pumpkin Distress Oxide ink on to my diagonal strip, sprayed it with my distress sprayer and dried any excess water with a paper towel. I dried the ink with my heat tool before stamping the small bat from the stamp set in a pattern using Versafine Onyx Black ink. I took another piece of white card stock and ran it through my die cutting machine with the medium Inside Scalloped Circle die from Craftin Desert Divas. I took the inner piece of the die cut and blended Squeezed Lemonade Distress Oxide ink all over, I also blended the smallest amount of Carved Pumpkin Distress Oxide ink over the edges for a little more dimension.
3.jpg4.jpg
I took my white panel and splattered it with Carved Pumpkin Distress Oxide ink and black watercolour paint. Once that was dry I prepped my panel with my EK Success Powder Tool Applicator. I stamped my sentiment using Versafine Onyx Black ink, coated it in clear embossing powder and set it with my heat tool.
5.jpg6
I adhered my diagonal strip with the bats and my black ribbon to my panel using double sided score tape. I took a long piece of black and white twine and cut it in to two pieces, adhering one end of each to the back of my panel (the shorter side to the right), I brought them both together over the front of my diagonal strip and tied them in a little bow. To finish my panel I popped the circle and cat up on some foam tape to add dimension to my card! I framed my panel using some black paper and adhered it to my card base.
41008071_309490073188431_3160495961579454464_n.jpg
Thanks for reading lovelies! I really love how this card turned out, it’s possibly my favourite Halloween card I’ve made so far this year! (I have a few more posts coming soon!) The images in this stamp set are some of my favourite Halloween stamps I own, and I’m for sure getting a lot of use out of them this year!

xo

Newton’s Nook Inky Paws:
Inky Paws Challenge #80 Blog Post

Supplies:

Stamps & Dies:
Newton’s Nook “Boo-tiful Night” Stamp Set
Craftin Desert Divas Inside Scalloped Circle Dies

Cards & Papers:
Hobbycraft White Premium Smooth Card(300gsm)
Hobbycraft Black Premium Card(180gsm)

Inks:
Carved Pumpkin Distress Oxide Ink
Squeezed Lemonade Distress Oxide Ink
Memento Tuxedo Black Ink
Versafine Onyx Black Ink

Embossing Powder:
Papermania Clear

Embellishments:
Sakura Gelly Roll Medium Point Pen(White)

Tools:
Tonic Studios Guillotine Trimmer
Sizzix Big Shot Machine
3M Scotch R Double Sided Foam Tape
EK Success Powder Tool Applicator
Papermania Heat Tool
Ranger Mini Ink Blending Tool

Friendship Cards, Halloween Cards, Uncategorized

Simple Halloween Card Using Lawn Fawn “Trick or Treat” set!

Hey lovelies!
I’ve been digging through my craft supplies and pulling out everything fall/Halloween related! If you know me, you know I love a good small stamp that I can make quick and easy backgrounds with! These candy corn from Lawn Fawn are no exception to that – look at their cute little faces! I couldn’t resist making a simple card using them!
1
I trimmed down a panel from white card stock and stamped my candy corn in a random pattern all over using Memento Tuxedo Black ink. I usually do these backgrounds with watercolour but I love how vivid my Spectrum Noir pens make the candy corn in this case!
23.jpg
When colouring I usually work from darkest to lightest:
Orange section: CR7 -> OR3 -> OR2
Yellow section: GB4 -> GB3 -> LY1
4.jpg
I added shadows using my GG1 Spectrum Noir marker, and highlights with my white gelly roll pen. I love adding these little details as I feel like it makes them stand out more!
5.jpg
I used the smallest of my Inside Scalloped Circle dies and cut it from white card stock, removing the middle piece that I would be using for my sentiment. I blended Squeezed Lemonade Distress Oxide ink on to my sentiment piece, before blending some Carved Pumpkin Distress Oxide ink around the edges for some dimension. I dried the ink with my heat tool and prepped with my EK Success powder tool applicator. I stamped my sentiment from Newton’s Nook’s “Boo-tiful Night” set using Versafine Onyx Black ink, coated it in clear embossing powder and set it with my heat tool. I picked out some orange ribbon and backed it with double sided score tape, I adhered that directly to my panel and popped my sentiment up with some foam tape. I backed my panel with double sided score tape and adhered to my card base!
40684855_473130436520396_6874617270652370944_n
Thank you for reading lovelies! ❤
This style of card is one of my favourites to make, especially if you don’t have a lot of time to craft! Quick and simple yet still adorable!

xo

Supplies:

Stamps, Dies & Stencils:
Lawn Fawn Trick or Treat Stamp Set
Newton’s Nook Boo-tiful Night Stamp Set
Craftin Desert Divas Inside Scalloped Circle Dies

Cards & Papers:
Hobbycraft White Premium Smooth Card Stock(300gsm)

Inks:
Memento Tuxedo Black Ink
Versafine Onyx Black Ink
Carved Pumpkin Distress Oxide Ink
Squeezed Lemonade Distress Oxide Ink

Embossing Powder:
Papermania Clear

Embellishments:
Sakura Gelly Roll Medium Point Pen(White)

Tools:
Tonic Studios Guillotine Trimmer
Sizzix Big Shot Machine
3M Scotch R Double Sided Foam Tape
EK Success Powder Tool Applicator
Papermania Heat Tool
Ranger Mini Ink Blending Tool

Friendship Cards, Halloween Cards, Uncategorized

Hey there Pumpkin! Cute Halloween Card using Newton’s Nook “Boo-tiful Night” set!

Hey lovelies!
Halloween is fast approaching and it’s my absolute favourite! I’ve already been stamping out everything Halloween in my stash ready to colour for more cards! I had to break open this Newton’s Nook Boo-tiful Night set first though, the adorable cats and pumpkins were calling to me!
40487965_729713747368455_4835227697405755392_n.jpg40421306_516119335503500_4227047250116739072_n.jpg
When I get a new stamp set I like to stamp all of the images out using Memento Tuxedo Black ink to colour up ready for when I need them. I’m planning to make and send out a lot of Halloween cards this year so I know every one of these adorable images will go to use! I used my Spectrum Noir alcohol markers to colour these cute kitties, a pink coloured pencil to add their rosy cheeks and my white gelly roll pen to add highlights. I fussy cut them all out before moving on to my background.
40513323_309805693117735_5816478495903055872_n.jpg
I used the Newton’s Nook “Flying Bats” stencil and Carved Pumpkin Distress Oxide ink to blend the bats on to some white card stock, after removing the stencil I blended the ink darker over the edges of my panel and gently blended it in to the middle for the lighter area. I splattered some black watercolour paint on my panel and allowed it to dry, I just love how black and orange look together so I couldn’t resist!
40519023_332012790907778_3260364555485708288_n
I cut my grass using Craftin Desert Divas’ “Outdoor Landscape” dies, I blended some Mowed Lawn Distress ink along with some Fossilized Amber near the top to give the effect that the top of the grass is glowing from the orange light. I prepped the grass with my powder tool applicator, stamped my sentiment using Versamark ink, coated it in Altenew “Pure White” embossing powder and set with my heat tool. I adhered my grass panel to my background and popped the adorable little cat and pumpkins up with some foam tape. I created a card base from heavyweight white card stock, cut down some black paper to frame my panel and adhered everything to the card base. I finished up by adding some Ebony Black Nuvo drops to draw attention to my sentiment then set my card to dry in a safe place for 24 hours.
40261786_329151554505563_5250034376133050368_n
Thank you for reading lovelies!<3
This is my first Halloween card of the year and I’m so excited to make more! You can expect to see many more over the next month!

xo

Supplies:

Stamps, Dies & Stencils:
Newton’s Nook Boo-tiful Night Stamp Set
Newton’s Nook Flying Bats Stencil
Craftin Desert Divas Outdoor Landscape Dies

Card Stock:
Hobbycraft White Premium Smooth Card Stock (300gsm)
Hobbycraft Black Premium Card Stock (180gsm)

Inks:
Carved Pumpkin Distress Oxide Ink
Mowed Lawn Distress Ink
Fossilized Amber Distress Ink
Memento Tuxedo Black Ink
Versamark Ink

Embossing Powder:
Altenew Pure White Crisp

Embellishments:
Sakura Gelly Roll Medium Point Pen (White)
Ebony Black Nuvo Drops

Tools:
Tonic Studios Guillotine Trimmer
Sizzix Big Shot Machine
3M Scotch R Double Sided Foam Tape
EK Success Powder Tool Applicator
Papermania Heat Tool

Craftin Desert Divas!, Friendship Cards, Uncategorized

Craftin Desert Divas August Release – Sneak Peek Day 3!

Hey lovelies!
It’s day 3 of Craftin Desert Divas’ August release sneak peek week! Today there is a whole lotta cuteness being showcased for your inspiration, so be sure to head over to the Craftin Desert Divas blog post to see what the other DT members have created for you!
Today I’m showcasing the Dam Shame set with this sweet little beaver and bug!
1.jpg
I started by cutting a panel from white card stock using the Torn Paper Dies, I blended over the polygon stencil using Broken China and Squeezed Lemonade Distress Oxide ink having them overlap in the middle to create the green shade. I lightly sprayed my panel with my Distress Sprayer bottle to give it a distressed look and dried the excess water droplets with a paper towel. I put down some of the Broken China Distress Oxide ink on a stamping block, mixed with a little water and splattered over the surface too for an extra layer before setting it aside to dry.
2.jpg
I stamped out my cute little beaver and bug using Memento Tuxedo Black ink before moving on to colouring with my Spectrum Noir alcohol markers.
3.jpg
I used TN5, TN3, TN1, GB2 & GB1 for the beaver’s fur. I used a combination of BG5, TN5 & TN3 for his tail and I filled his nose in with IG5. I used TN5 & TN3 for the twigs, along with LG5 & LG3 for the leaves. For his glasses I blended DR2 & CR7 and finished him up with a little GG1 to shade his eyes and just under his top lip before adding my highlights using my white gelly roll pen. I coloured the body of the bug with GB4 & LY1 and the wings with GT1 & IB1 and added a few small highlights along the top of his head and wings.
4.jpg
I cut a panel using white card stock and used the large Torn Paper die to cut a window so I could inlay my ink blended panel. I prepped my panel with my powder tool applicator before stamping my sentiment in Versafine Onyx Black ink, coated it in clear embossing powder and set it with my heat tool. I fussy cut my characters out and popped them up with some foam tape to the left of my sentiment.
5.jpg
I adhered my panel to my card base using some foam tape and added some glow in the dark Nuvo drops in the shade Blue Crush to finish my card, leaving them to set for a full 24 hours in a safe space.
Dam Shame 1 August 2018.jpg
Thank you for stopping by lovelies! This set is just too cute I can’t wait for you to see it all! Remember to head to the August release event on facebook and click “going” if you haven’t already! Myself and the other DT members are sharing our projects in there and the Craftin Desert Divas Gallery all throughout release week!

CDD-ReleaseAugust2018-Facebook-Event-Cover-Photo

xo

Craftin Desert Divas
Shop
CDD Sneak Peek Day 3 Blog Post!

Supplies
Links to new products will be added when they become available!
Dam Shame Stamp Set
Polygon Stencil
Torn Paper Dies
Broken China Distress Oxide Ink
Squeezed Lemonade Distress Oxide Ink
Memento Tuxedo Black Ink
Powder Tool Applicator
Nuvo Glow In The Dark Drops – Blue Crush
White Gelly Roll Medium Point Pen

♥ Please note that the links to products and the CDD shop are affiliate links. If you choose to make a purchase through these links I will receive a small commission at no extra cost to you. ♥
36901571_10160798146590271_7415108762773487616_o


Craftin Desert Divas!, Friendship Cards, Just Because Cards, Uncategorized

Let’s Get Coloring! Craftin Desert Divas Designer Challenge!

Hey lovelies!
Today I’m taking part in the Craftin Desert Divas Let’s Get Colouring Designer Creative Challenge! Where some of the CDD design team are sharing tips and tricks on how they colour their stamped images, so be sure to head over to the Craftin Desert Divas blog post where each designer is highlighted!

I decided to use alcohol markers to colour my image today, when I first started card making just over a year ago, I found using alcohol markers really intimidating as I had never used them before! I’ve found though that practice really is the key to finding how you like colouring with them! If like me you’re using Spectrum Noir markers, I would definitely suggest making a swatch sheet of the pens you own, it’ll make it easier for you to see which colours would likely go together! Today I’ll be sharing how I find it works best for me with the Spectrum Noir alcohol markers.

1.jpg
I always start by stamping two of the image I want to colour, that way if I make a mistake I have another one ready! Today I’ll be colouring this adorable bunny chasing the butterfly from the brand new Brighter Days set from Craftin Desert Divas.
2.jpg3.jpg4.jpg
My general rule of thumb is to start with my darkest shade, blend it out slightly with my medium shade then finish by blending in my lightest shade. For the bunny’s face/ears/hands I used: IG5, GG2 & GG1.
5.jpg678.jpg
Moving on to the clothes, I stick to the same rule of darkest > lightest but for the yellows and blues I only use two of each shade. For the yellows I used: GB3 & LY1 and for the blues I used: GT2 & IB1. If you don’t have a medium shade and the two colours you have are too far from each other to blend, you can try touching the tip of your dark marker to your light one to create a medium shade!
9.jpg10.jpg
I used TN3 to colour my net, as it’s such a thin area there isn’t need for much shading on it. For the bunny’s little squirrel friend I used: TN5 & TN3 for the darker area of his fur and for the lighter areas I used: TN3 as my darkest and TN1 as my lightest. For the butterfly I blended an orange marker: OR2 and a yellow: LY1 for the main part of the wings, the dot details and the butterfly’s body were coloured using IG5. I coloured the inside of the bunny’s mouth using IG5 too, and then used CR9 and CR4 for their tongues.
11.jpg
I then added some rosy cheeks using a pink coloured pencil, and added dotting details and highlights using a white permanent chalk pen.
12.jpg
I fussy cut my image out and set it aside while I assembled the rest of my card.

I started with my background panel by die cutting a panel using the largest of the Crazy Stitched Frame Dies from heavyweight white card stock. I splattered it with distress ink by laying some ink down on my craft mat and diluting it with water before picking it up with a paint brush, to splatter it I simply held the brush above my panel and tapped on it lightly. I used peacock feathers and mustard seed on their own, then mixed them to create the green splatter. I set that aside to dry while I worked on the “grass” the critters are running on.
I cut another piece of white card stock using the largest of the Crazy Stitched Frame Dies, then cut the stitched border across it using a die from the Shake It Up Dies set. I then took mowed lawn and blended it on my card stock using an ink blending tool before setting it quickly with a heat tool so I could move on to embossing my sentiment. I prepped my grass panel with my powder tool applicator, stamped my sentiment “Sending HUGS” from the Wishful Thoughts stamp set with Versamark ink, coated it with white embossing powder and set it with my heat tool.
I adhered my grass panel to my splattered panel using double sided tape and popped the bunny up with double sided foam tape at the right side of the panel. I created my card base and cut down some yellow spotted patterned paper and adhered it to my base using score tape, before backing my entire panel with double sided foam tape and adhering it to my card base.

CDD DT Coloring Challenge July 18

Thanks for stopping by lovelies! ❤
Remember to head on over to the Craftin Desert Divas Blog to check out what the other Design Team members have created!

xo

Craftin Desert Divas
Shop

Supplies
Brighter Days Stamp Set
Wishful Thoughts Stamp Set
Crazy Stitched Frame Dies
Shake It Up Dies
Powder Tool Applicator
Versamark Ink

♥ Please note that the links to products and the CDD shop are affiliate links. If you choose to make a purchase through these links I will receive a small commission. ♥

36901571_10160798146590271_7415108762773487616_o