Craftin Desert Divas!, Friendship Cards, Thank You Cards, Uncategorized

Craftin Desert Divas August Release: Blog Hop!

Hey lovelies!
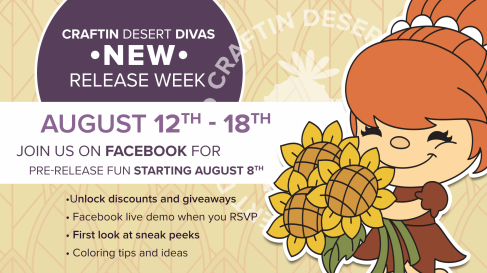
Yesterday marked the official release of the new Craftin Desert Divas’ August products and day 1 of the blog hop! If you missed any of the fun and inspiration from the DT members yesterday, you can head to the CDD August release blog hop day 1 & product reveal post to catch up! However if you’ve come here from Maaike’s blog post then you’re in the right place, if you’ve got lost you can head over to the Craftin Desert Divas August release blog hop day 2 post to find where you were again!
Today I’m recapping the cards I created and shared during sneak peek week for you! I’m a huge lover of fall, ever since I was a kid I’ve loved watching the leaves change colour and the air gets crisper, which is why I’m so excited about this release! Crisp leaves, fall friends and more makes this release as sweet as it gets. Once you’re finished hopping along, be sure to head over to the Craftin Desert Divas Shop to grab your special discount – 5% off until August 19th! ❤
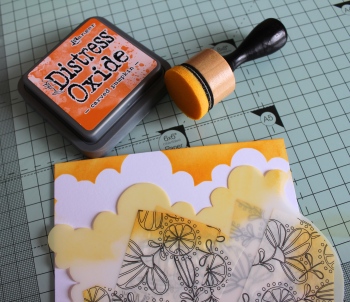
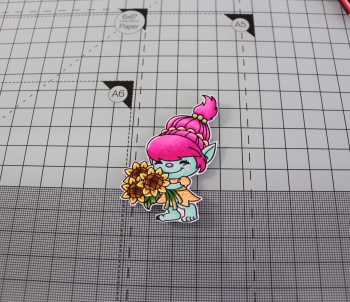
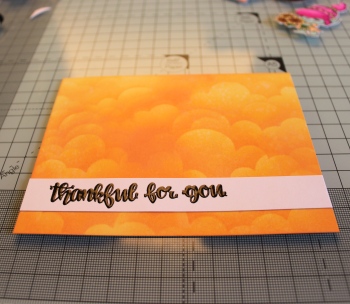
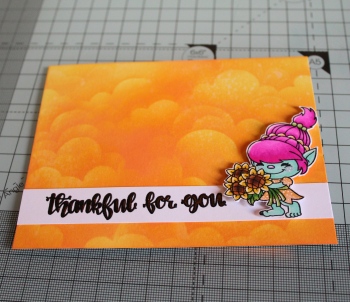
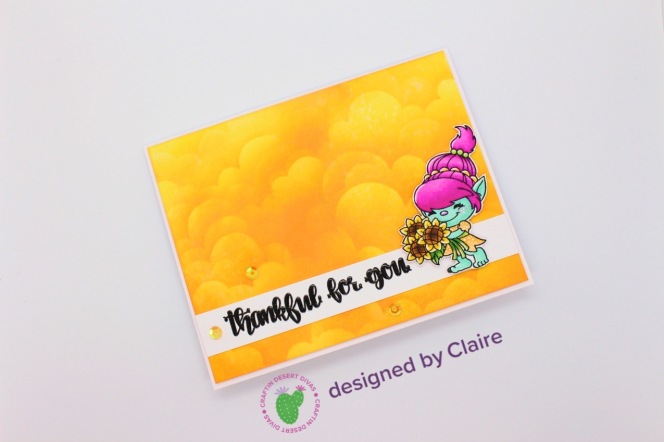
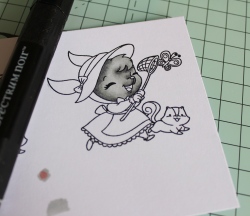
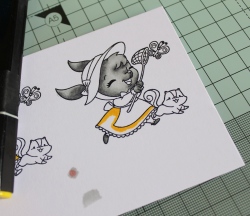
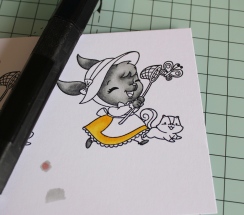
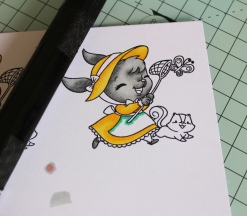
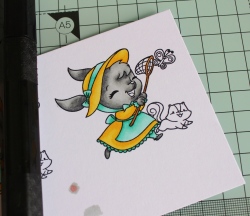
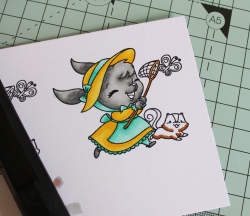
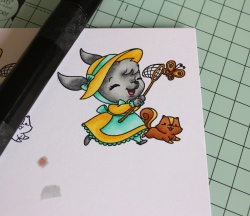
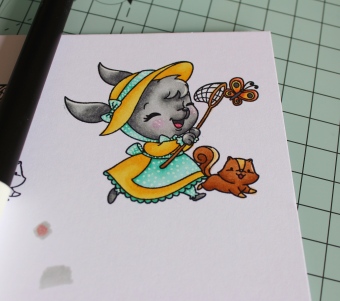
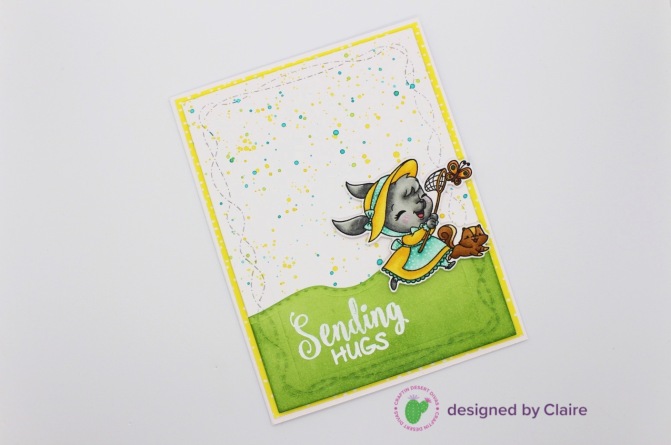
The first card I shared was using the adorable new Grateful Trolls stamp set and the Hill Scene 2 stencil! For more details on this card you can head to my blog post here.
Grateful Trolls 1 August 2018
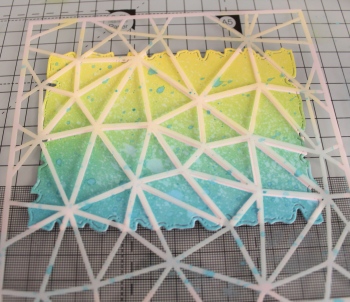
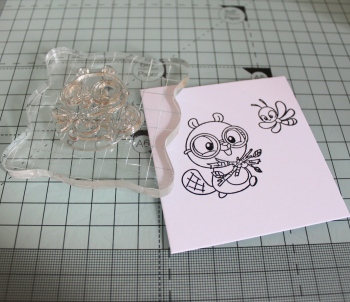
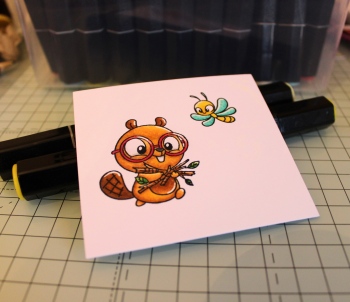
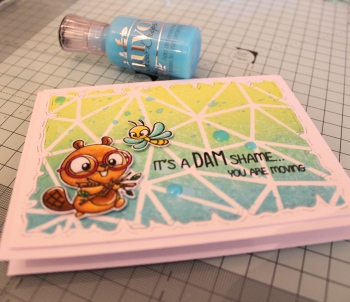
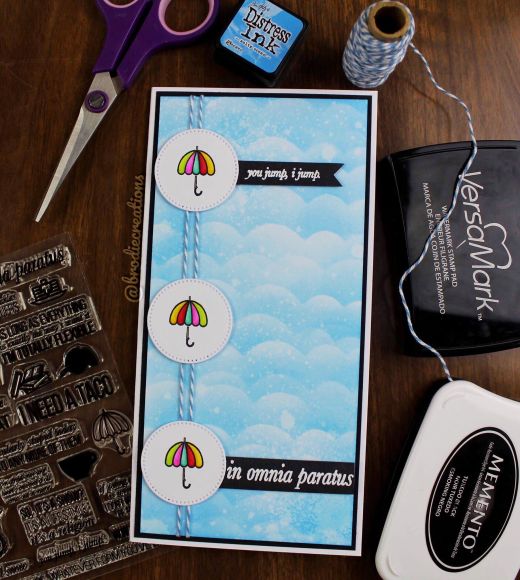
For the second card I shared I used the super sweet Dam Shame stamp set! How sweet is this little beaver?! For more details on this card you can head to my blog post here.
Dam Shame 1 August 2018
Thank you for stopping by lovelies! What are your favourite products from the new August release?! I know, it’s such a hard decision! I had so much fun playing with these cute trolls and sweet beavers!
36901571_10160798146590271_7415108762773487616_o

xo
August Release Day 2 Hop List!
Start: Craftin Desert Divas
Jan
Angelica (Guest Designer)
Elaine
Maaike
You are here: Claire-Anne
Next: Courtney
Mari
Candice
Ashlee
Michelle
Sherry
Holly
Charlotte
Rachel
New Release Blog Hop.png

Craftin Desert Divas
Shop
39301800_660512880996060_4892009647549972480_n

♥ Please note that the links to products and the CDD shop are affiliate links. If you choose to make a purchase through these links I will receive a small commission at no extra cost to you. ♥
Craftin Desert Divas!, Friendship Cards, Uncategorized

Craftin Desert Divas August Release – Sneak Peek Day 3!

Hey lovelies!
It’s day 3 of Craftin Desert Divas’ August release sneak peek week! Today there is a whole lotta cuteness being showcased for your inspiration, so be sure to head over to the Craftin Desert Divas blog post to see what the other DT members have created for you!
Today I’m showcasing the Dam Shame set with this sweet little beaver and bug!
1.jpg
I started by cutting a panel from white card stock using the Torn Paper Dies, I blended over the polygon stencil using Broken China and Squeezed Lemonade Distress Oxide ink having them overlap in the middle to create the green shade. I lightly sprayed my panel with my Distress Sprayer bottle to give it a distressed look and dried the excess water droplets with a paper towel. I put down some of the Broken China Distress Oxide ink on a stamping block, mixed with a little water and splattered over the surface too for an extra layer before setting it aside to dry.
2.jpg
I stamped out my cute little beaver and bug using Memento Tuxedo Black ink before moving on to colouring with my Spectrum Noir alcohol markers.
3.jpg
I used TN5, TN3, TN1, GB2 & GB1 for the beaver’s fur. I used a combination of BG5, TN5 & TN3 for his tail and I filled his nose in with IG5. I used TN5 & TN3 for the twigs, along with LG5 & LG3 for the leaves. For his glasses I blended DR2 & CR7 and finished him up with a little GG1 to shade his eyes and just under his top lip before adding my highlights using my white gelly roll pen. I coloured the body of the bug with GB4 & LY1 and the wings with GT1 & IB1 and added a few small highlights along the top of his head and wings.
4.jpg
I cut a panel using white card stock and used the large Torn Paper die to cut a window so I could inlay my ink blended panel. I prepped my panel with my powder tool applicator before stamping my sentiment in Versafine Onyx Black ink, coated it in clear embossing powder and set it with my heat tool. I fussy cut my characters out and popped them up with some foam tape to the left of my sentiment.
5.jpg
I adhered my panel to my card base using some foam tape and added some glow in the dark Nuvo drops in the shade Blue Crush to finish my card, leaving them to set for a full 24 hours in a safe space.
Dam Shame 1 August 2018.jpg
Thank you for stopping by lovelies! This set is just too cute I can’t wait for you to see it all! Remember to head to the August release event on facebook and click “going” if you haven’t already! Myself and the other DT members are sharing our projects in there and the Craftin Desert Divas Gallery all throughout release week!

CDD-ReleaseAugust2018-Facebook-Event-Cover-Photo

xo

Craftin Desert Divas
Shop
CDD Sneak Peek Day 3 Blog Post!

Supplies
Links to new products will be added when they become available!
Dam Shame Stamp Set
Polygon Stencil
Torn Paper Dies
Broken China Distress Oxide Ink
Squeezed Lemonade Distress Oxide Ink
Memento Tuxedo Black Ink
Powder Tool Applicator
Nuvo Glow In The Dark Drops – Blue Crush
White Gelly Roll Medium Point Pen

♥ Please note that the links to products and the CDD shop are affiliate links. If you choose to make a purchase through these links I will receive a small commission at no extra cost to you. ♥
36901571_10160798146590271_7415108762773487616_o


Craftin Desert Divas!, Friendship Cards, Just Because Cards, Thank You Cards, Uncategorized

Craftin Desert Divas August Release – Sneak Peek Day 2!

Hello lovelies!
August release week with Craftin Desert Divas is finally here! I know some of you have been just as excited as I am, so I’m here to showcase a card I made using the brand new adorable set Grateful Trolls and the new Hill Scene 2 stencil! I am madly in love with this set and I know all of you will be too! Make sure you click “going” to the facebook event for this release so you don’t miss out on any of the fun!
1.jpg
I started off by cutting down a panel from white card stock. I blended in clouds using the Hill Scene 2 stencil, Carved Pumpkin and Squeezed Lemonade Distress Oxide ink, changing up which side of the stencil I use each time and sometimes even flipping it over! I lightly sprayed the panel with my Distress Sprayer bottle when I had covered the entire panel and mopped up the excess using a paper towel.
2.jpg
I stamped my cute little troll using Memento Tuxedo Black ink and coloured her using my Spectrum Noir alcohol markers. I added some rosy cheeks with a pink pencil, added three little dots to each cheek using my white gelly roll pen before adding highlights to the rest of my image. Once they had dried I fussy cut my image out and set it aside for a bit.
3.jpg
I cut a strip of white card stock to fit across my panel for my sentiment and to ground my troll later on. I prepped the strip with my powder tool applicator, stamped my sentiment in Versafine Onyx Black ink, coated it in clear embossing powder and set it with my heat tool. I adhered the strip to my panel using double sided tape.
4.jpg
I adhered my troll to my panel using double sided foam tape before backing my entire panel with the same tape and adhering to my card base. I adhered a couple of sequins from the Fall Harvest mix using liquid adhesive to finish this card up and give it a little sparkle!
Grateful Trolls 1 August 2018
Thank you for stopping by lovelies! I can’t wait for you to see the rest of the release and the full sets! They’re too cute to resist! What are your thoughts on what you’ve seen this week so far?! Are you planning your ideas yet? 😉
Remember to stop by the Craftin Desert Divas Blog post to see what amazing peeks and inspiration the other DT members have in store for you! ❤

CDD-ReleaseAugust2018-Facebook-Event-Cover-Photo.png

xo

Craftin Desert Divas
Shop
CDD Sneak Peek Day 2 Blog Post!

Supplies
Links to new products will be added when they become available!
Grateful Trolls Stamp Set
Hill Scene 2 Stencil
Carved Pumpkin Distress Oxide Ink
Squeezed Lemonade Distress Oxide Ink
Memento Tuxedo Black Ink
Versafine Onyx Black Ink
Powder Tool Applicator
White Gelly Roll Medium Point Pen
Fall Harvest Sequins

♥ Please note that the links to products and the CDD shop are affiliate links. If you choose to make a purchase through these links I will receive a small commission at no extra cost to you. ♥
36901571_10160798146590271_7415108762773487616_o


Craftin Desert Divas!, Friendship Cards, Just Because Cards, Uncategorized

Let’s Get Coloring! Craftin Desert Divas Designer Challenge!

Hey lovelies!
Today I’m taking part in the Craftin Desert Divas Let’s Get Colouring Designer Creative Challenge! Where some of the CDD design team are sharing tips and tricks on how they colour their stamped images, so be sure to head over to the Craftin Desert Divas blog post where each designer is highlighted!

I decided to use alcohol markers to colour my image today, when I first started card making just over a year ago, I found using alcohol markers really intimidating as I had never used them before! I’ve found though that practice really is the key to finding how you like colouring with them! If like me you’re using Spectrum Noir markers, I would definitely suggest making a swatch sheet of the pens you own, it’ll make it easier for you to see which colours would likely go together! Today I’ll be sharing how I find it works best for me with the Spectrum Noir alcohol markers.

1.jpg
I always start by stamping two of the image I want to colour, that way if I make a mistake I have another one ready! Today I’ll be colouring this adorable bunny chasing the butterfly from the brand new Brighter Days set from Craftin Desert Divas.
2.jpg3.jpg4.jpg
My general rule of thumb is to start with my darkest shade, blend it out slightly with my medium shade then finish by blending in my lightest shade. For the bunny’s face/ears/hands I used: IG5, GG2 & GG1.
5.jpg678.jpg
Moving on to the clothes, I stick to the same rule of darkest > lightest but for the yellows and blues I only use two of each shade. For the yellows I used: GB3 & LY1 and for the blues I used: GT2 & IB1. If you don’t have a medium shade and the two colours you have are too far from each other to blend, you can try touching the tip of your dark marker to your light one to create a medium shade!
9.jpg10.jpg
I used TN3 to colour my net, as it’s such a thin area there isn’t need for much shading on it. For the bunny’s little squirrel friend I used: TN5 & TN3 for the darker area of his fur and for the lighter areas I used: TN3 as my darkest and TN1 as my lightest. For the butterfly I blended an orange marker: OR2 and a yellow: LY1 for the main part of the wings, the dot details and the butterfly’s body were coloured using IG5. I coloured the inside of the bunny’s mouth using IG5 too, and then used CR9 and CR4 for their tongues.
11.jpg
I then added some rosy cheeks using a pink coloured pencil, and added dotting details and highlights using a white permanent chalk pen.
12.jpg
I fussy cut my image out and set it aside while I assembled the rest of my card.

I started with my background panel by die cutting a panel using the largest of the Crazy Stitched Frame Dies from heavyweight white card stock. I splattered it with distress ink by laying some ink down on my craft mat and diluting it with water before picking it up with a paint brush, to splatter it I simply held the brush above my panel and tapped on it lightly. I used peacock feathers and mustard seed on their own, then mixed them to create the green splatter. I set that aside to dry while I worked on the “grass” the critters are running on.
I cut another piece of white card stock using the largest of the Crazy Stitched Frame Dies, then cut the stitched border across it using a die from the Shake It Up Dies set. I then took mowed lawn and blended it on my card stock using an ink blending tool before setting it quickly with a heat tool so I could move on to embossing my sentiment. I prepped my grass panel with my powder tool applicator, stamped my sentiment “Sending HUGS” from the Wishful Thoughts stamp set with Versamark ink, coated it with white embossing powder and set it with my heat tool.
I adhered my grass panel to my splattered panel using double sided tape and popped the bunny up with double sided foam tape at the right side of the panel. I created my card base and cut down some yellow spotted patterned paper and adhered it to my base using score tape, before backing my entire panel with double sided foam tape and adhering it to my card base.

CDD DT Coloring Challenge July 18

Thanks for stopping by lovelies! ❤
Remember to head on over to the Craftin Desert Divas Blog to check out what the other Design Team members have created!

xo

Craftin Desert Divas
Shop

Supplies
Brighter Days Stamp Set
Wishful Thoughts Stamp Set
Crazy Stitched Frame Dies
Shake It Up Dies
Powder Tool Applicator
Versamark Ink

♥ Please note that the links to products and the CDD shop are affiliate links. If you choose to make a purchase through these links I will receive a small commission. ♥

36901571_10160798146590271_7415108762773487616_o


Friendship Cards, Just Because Cards, Uncategorized

In Omnia Paratus Card Using Ink Road Stamps “Stars Hollow”!

Hey lovelies! ❤

Today I want to share with you the second card I’ve made with this gorgeous stamp set from Ink Road Stamps! Anybody who watches Gilmore Girls will know of the Life and Death Brigade and the latin term ‘In Omnia Paratus’ which means ‘ready for anything’! Some of my favourite moments in the show happened with Rory and the Life and Death Brigade, although I’m still team Jess! With that being said, I couldn’t NOT make this card!

~Tools and products used will be listed at the end of this blog post!~

33377003_2113442525350239_8902136490595713024_n.jpg

I made my tall card base and cut a panel slightly smaller from white card stock, I wanted it to represent the jump made by Rory and Logan with the rest of the group so I felt it was most appropriate! I cut a cloud shape stencil from white card stock again, and began inking my panel from the top with my Ranger/Tim Holtz Salty Ocean Distress Ink. I kept blending the colour all the way down to the bottom of my panel, once finished I distressed it with my Distress Spray bottle.

For the little umbrellas I stamped them with Tsukineko Memento tuxedo black ink on white card stock, then coloured them in rainbow colours using my Spectrum Noir alcohol markers. I took a small circle die and cut them out using my Big Shot machine.

For my sentiments I treated some black card stock with my EK Success powder tool, so the embossing powder wouldn’t stick to anywhere else apart from where I stamped. I stamped both sentiments in Tsukineko Versamark ink, covered them in Altenew pure white embossing powder and set them with my heat tool before cutting them in to thin strips using my paper trimmer. I used my scissors to create a little fish tail banner for the “you jump, I jump” sentiment.

For assembly I began by cutting down some black matte paper to create a border around my panel on the card, adhering it to my card base with my regular tape runner. I then wrapped some blue and white twine around the left side of my panel, adhering it to the back with some washi tape. I backed the umbrella circles and sentiments with double sided foam tape, adhered the umbrellas over the twine and put the sentiments in place where I had planned. I finished by backing the entire panel in foam tape and adhering to my card base.

33306867_2113442595350232_1684195614658658304_n.jpg

Thanks for reading lovelies! ❤ Are any of you here Gilmore Girls fans? I’ve honestly lost count how many times I’ve watched the show from beginning to end, including the newest four episodes released on Netflix! The Ink Road Stamp is now open again! Head on over using the links below to check it out, and see the new products for yourself! ❤

xo

~Supplies & Links~

**Not all supplies can be listed as they’re from local craft stores, but you can easily find similar things online as they’re pretty common!**

STAMPS:

Ink Road Stamps “Stars Hollow”

INK ROAD DISCOUNTS:

50% off your FIRST order at the Ink Road Stamps shop!

Referral code (10% off for existing customers!): claireanne10

CARDSTOCK/PAPER:

Hobbycraft White Premium Smooth Card Stock (300gsm)

INKS:

Tsukineko Versamark “Watermark” Ink

Ranger/Tim Holtz Salty Ocean Distress Ink

Tsukineko Memento Tuxedo Black Ink

POWDER TOOL:

EK Success Powder Tool

FOAM TAPE:

3M Scotch R Double Sided Foam Tape

INK BLENDING:

Ranger/Tim Holtz Ink Blending Tool

DIE CUTTING MACHINE:

Sizzix Big Shot

PAPER TRIMMER:

Tonic Studios Guillotine Trimmer

EMBOSSING POWDER:

Altenew Pure White

SPRAY BOTTLES:

Ranger/Tim Holtz Distress Sprayer

Friendship Cards, Just Because Cards, Uncategorized, Watercolour Cards

I Miss You Friendship Card Using Distress Inks!

Hello lovelies! ❤

Sharing another quick and easy card with you today, perfect to send to those you may not see every day!

~Tools and products used will be listed at the end of this blog post!~

32947045_2108496255844866_727634259568754688_n

I cut a panel from white card stock and picked which distress ink colours I wanted to work with (colours used & links will be listed at the end of this post!). The sun was shining so it only seemed right to go for some red, yellow and pink for that summery feel! I placed the inks directly on to my glass craft mat and sprayed with some water, then smooshed my panel on the surface to pick up the colour remembering to dry between each layer for a textured feel. When I was happy with how  it looked I splattered it with some gold metallic watercolour paint from my Gansai Tambi “Starry Colors” palette and set aside to dry.

I created my card base and top panel using white card stock and rounded the corners with a corner punch. I then cut some black matte paper larger than my top panel and rounded the corners for a cohesive look and adhered to my card base. To finish my top panel I die cut the stitched heart window with Lawn Fawn’s Outside In Stitched Heart stackable dies.

For my sentiment I decided to go with the “I Miss You” stamp from Simon Says Stamp “Seeing Stars”. I treated some black card stock with my EK Success powder tool, stamped my sentiment in Versamark ink and heat embossed it with Altenew Pure White embossing powder. I cut it down in to a thin sentiment strip and adhered it across the back of my stitched heart using my regular tape runner.

To finish the card I backed the stitched heart panel with foam tape and adhered it to the ink smooshed panel, then adhered it to my card base using my regular tape runner.

32929181_2108496385844853_8839718534041829376_n

Thanks for reading lovelies! ❤ Do you prefer simpler cards or cards with a lot of colour and images? Let me know in the comments below! ❤

xo

~Supplies & Links~

**Not all supplies can be listed as they’re from local craft stores, but you can easily find similar things online as they’re pretty common!**

STAMPS:

Simon Says Stamp “Seeing Stars”

DIES:

Lawn Fawn Outside In Stitched Heart Stackables

CARDSTOCK/PAPER:

Hobbycraft White Premium Smooth Card (300gsm)

FOAM TAPE:

3M Scotch R Double Sided Foam Tape

WATERCOLOUR PAINT:

Gansai Tambi “Starry Colors”

DIE CUTTING MACHINE:

Sizzix Big Shot

POWDER TOOL:

EK Success Powder Tool

INKS:

Ranger/Tim Holtz Picked Raspberry Distress Ink

Ranger/Tim Holtz Abandoned Coral Distress Ink

Ranger/Tim Holtz Fossilized Amber Distress Ink

Tsukineko Versamark “Watermark” Ink

HEAT TOOL:

Papermania Multi-Purpose Heat Tool

PAPER TRIMMER:

Tonic Studios Guillotine Trimmer

EMBOSSING POWDER:

Altenew Pure White

Birthday Cards, Uncategorized

Cute Alien Card Using Lawn Fawn “Beam Me Up!”

Hello lovelies! ❤

Today I’m sharing this space themed card using Lawn Fawn’s Beam Me Up stamp set. I have a soft spot for anything to do with space, and who could resist these adorable little aliens?! I used some stamps Lawn Fawn’s Out Of This World set too, specifically the planets! 🙂

~Tools and products used will be listed at the end of this blog post!~

32080321_2095411943819964_725680143938355200_n.jpg

I started by stamping out my images and colouring them with my Spectrum Noir alcohol markers (although for the glass in the space ship I did use a light blue coloured pencil as I don’t currently have a colourless blender!). I wanted them to be in bright, fun colours as I felt this card would be perfect for a kid’s birthday! For the alien in the space ship I stamped the ship first, creating a mask using a post-it note and stamped the alien over top to give the illusion he’s sitting in the ship! Once I had my images all coloured I added some details and highlights with my white gel pen before fussy cutting them out by hand. For the beam coming out of the space ship I knew I wanted it to be transparent, so the cake would be visible while the alien is sneaking it on to their ship! Sneaky! I achieved this by heat embossing on some heat resistant acetate with my Altenew pure white embossing powder then fussy cut around the embossed lines. I adhered the beam directly on to the back of the space ship so it would be popped up on the same level as the ship when I finished the card.

I created my card base and cut a panel slightly smaller from white card stock. I adhered some black matte paper to my card base for the black border. I wanted the card to be on the fun and colourful side but still with that galaxy sky feel, I knew I was going to adhere a circle panel to the bottom of the card for the sentiment (and for those sneaky aliens to be standing on!). I left a lighter blue aura around where the “moon” would be and blended purple/pink and blue together for the top to make it darker. I sprayed the background with my Ranger/Tim Holtz distress sprayer, then splattered the background with white paint and metallic watercolour paint from my Gansai Tambi “Starry Colors” palette for a little shimmer.

I die cut a circle panel from white card stock and adhered it to the panel, cutting off any excess from the sides. I prepped it with my EK Success powder tool so embossing powder would only stick to where I stamped my sentiment. I stamped my sentiment using versafine onyx black ink and coated it with Papermania clear embossing powder before setting it with my heat tool until it was smooth and shiny. I adhered all my images where I wanted them using my usual tape runner apart from the space ship with the acetate attached, and the earth which I popped up using foam tape. To finish I backed the entire panel in foam tape and adhered to my card base.

32130591_2095411910486634_1529831075541417984_n.jpg

Thanks for reading lovelies! ❤ I loved getting back in to colouring with my alcohol markers with this card, it feels like I’ve been mainly focused on watercolour lately while trying to get used to the medium and then falling madly in love with it. For all you crafty geniuses, which medium is your absolute favourite to use? I want to keep trying new things as I move forward! ❤

xo

~Supplies & Links~

**Not all supplies can be listed as they’re from local craft stores, but you can easily find similar things online as they’re pretty common!**

STAMPS:

Lawn Fawn “Beam Me Up”

Lawn Fawn “Out Of This World”

CARDSTOCK/PAPER:

Hobbycraft White Premium Smooth Card Stock (300gsm) 

INKS:

Ranger/Tim Holtz Salty Ocean Distress Ink

Ranger/Tim Holtz Picked Raspberry Distress Ink

Ranger/Tim Holtz Seedless Preserves Distress Ink

Tsukineko Versafine Onyx Black Ink

FOAM TAPE:

3M Scotch R Double Sided Foam Tape

WATERCOLOUR PAINT:

Gansai Tambi “Starry Colors”

POWDER TOOL:

EK Success Powder Tool

INK BLENDING:

Ranger/Tim Holtz Ink Blending Tool

DIE CUTTING MACHINE:

Sizzix Big Shot

PAPER TRIMMER:

Tonic Studios Guillotine Trimmer

EMBOSSING POWDER:

Altenew Pure White

Papermania Clear

Birthday Cards, Uncategorized

Cute Dragon Birthday Card Using Mama Elephant Stamps!

Hello lovelies! ❤ If you follow my Instagram (@brodiecreations) you may know I recently got a couple of new stamp sets, including the Me and My Dragon and Dragon Wishes sets from Mama Elephant! These stamps are so adorable I had to break them out for my little brother’s birthday card this year! He turns 10 today and I’m completely gobsmacked at how fast he’s growing up!

~Tools and products used will be listed at the end of this blog post!~

31819882_2090089877685504_5742487788624805888_n

I stamped my images using Tsukineko Memento Tuxedo Black ink as I wanted to use my Spectrum Noir alcohol markers to colour the dragons for this card. I decided to stick to blues and greens for the smaller dragons so the reds and oranges in the larger dragon would be the main focus. Once my images were all coloured, I added some white highlights as well as some dotting for details using my white gel pen then fussy cut them out leaving a thin white border.

I created my card base from white card stock and cut my panel slightly smaller on all sides. I knew as the colour of the images were quite bold I wanted to go for a softer sky background. I used my Ranger/Tim Holtz Salty Ocean and Picked Raspberry distress inks to softly ink blend some colour on to my background, I didn’t need the coverage to be perfect as I felt like it added to the feel of the card. I distressed it slightly with my distress sprayer and dried the droplets with a paper towel. I die cut some clouds from white card stock and adhered them on to my panel using my usual tape runner, trimming off any excess that hung over the edges.

For the sentiment I took some black card stock and prepped it with my EK Success powder tool, stamped my sentiment with Tsukineko Versamark ink and heat embossed it with Altenew Pure White embossing powder. I trimmed it in to a small strip and cut a fish tail at the end before adhering it to the left side of my card just above where I wanted the main dragon to go.

To finish up I adhered the smaller dragons using my tape runner, then backed the large dragon, flame and the cake with foam tape then adhered them to my panel. I backed the entire panel in foam tape and adhered it directly to my card base before dotting some Nuvo Glow Drops all over.

31755436_2090089884352170_8542663889882447872_n

Thank you for reading lovelies! ❤ I had so much fun playing with these new stamps! I’m definitely going to be getting a lot of use out of these cuties, so expect more posts using them in the future! The Nuvo Glow Drops were a first for me, I’ve had them in my stash for a little while but I never found quite the right time to use them. I wasn’t sure what to expect but wow! I didn’t expect them to glow so bright!

31749425_2090068451020980_6105116344192073728_n

xo

~Supplies & Links~

**Not all supplies can be listed as they’re from local craft stores, but you can easily find similar things online as they’re pretty common!**

STAMPS:

Mama Elephant “Me and My Dragon”

Mama Elephant “Dragon Wishes”

CARDSTOCK/PAPER:

Hobbycraft White Premium Smooth Card Stock (300gsm)

INKS:

Ranger/Tim Holtz Salty Ocean Distress Ink

Ranger/Tim Holtz Picked Raspberry Distress Ink

Tsukineko Versamark Watermark Ink

Tsukineko Memento Tuxedo Black Ink

FOAM TAPE:

3M Scotch R Double Sided Foam Tape

POWDER TOOL:

EK Success Powder Tool

INK BLENDING:

Ranger/Tim Holtz Ink Blending Tool

PAPER TRIMMER:

Tonic Studios Guillotine Trimmer

EMBOSSING POWDER:

Altenew Pure White

EMBELLISHMENTS:

Nuvo Glow Drops “Blue Crush”